Wood photo transfers have become one of my go-to craft gifts as they are simple and have that personalized touch! It’s a fun way for friends and family to display their favorite photos in their home!
You can use any smooth wood surface whether it be a bark edged piece or a wooden box canvas. All of the products can be purchased at your local craft store.
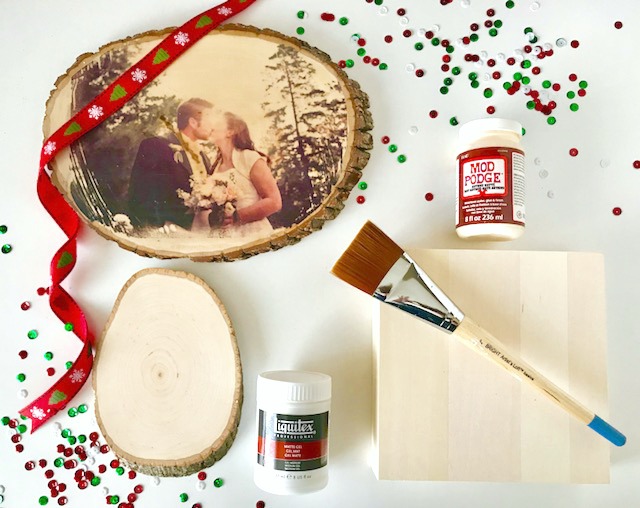
Wood Photo Transfers
Follow these super easy steps for a fun gift that’s bound to please!
- Print the reverse image of your selected picture.
- Cut the picture to fit your selected canvas.
- Coat your wood surface generously with Acrylic Gel Medium (you can find this in the art supply section of your craft store) It will go on white but dries clear. Make sure to brush all of the medium in the same direction.
- Lay your picture face down onto wood and smooth evenly.
- Let dry 8hrs.
- Use a damp dishrag and rub over the picture. You may need to re-wet the cloth a few times to rub and remove all of the paper. Let wood dry.
- Coat the picture with Mod Podge and make sure to brush in the same direction. (I really like the Antique Mod Podge) Let wood dry and you’re done!
Wood Photo Transfers Tips
The thicker you coat your Gel Medium, the less your picture will rub off. SO if you want an antique look around the edges, use less Gel Medium there.
For any portraits make sure you coat the Gel Medium heavily where the faces will be — I learned the hard way when my friend’s face rubbed off during my first attempt!
You can also add embellishments with glitter or gold leafing. If you’re using a wood box canvas, feel free to paint any significant dates or names along the edge!
Have fun and happy crafting!
Have any questions? Please comment below! If you tried this out, I’d love to know!
Caitlin — Mom of Odin
Leave a Reply